🛠️ What Have You Done To Your LC250 Today?

Thanks!

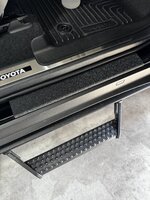
The negative bus bar is purely for ease of making multiple ground connections and totally not required. Its the one laying on top of the OEM fuse/relay panel in the pic, only reason I got one is it was cheap and I knew I'd be blocking the most accessible ground point once I mounted the assy. panel. The other smaller water tight box is the positive bus bar.
What I did......
Fuse Box.JPG
 
Stock premium rims. Michelin Defender LTX-265-60-20.
2 of them required 1.25 oz for perfect stability on the rotary balancer
2 of them required zero weight for a perfect spin up.
How good are the Toyota rims and Michelin tires, that good.
Carry on.
 
Went down to IMSA 12 Hours of Sebring races. Taking the two lane roads down there I had to pass like three cars you could see probably a mile. I looked down and were at three digits MPH. Wondering if anyone else has had there LC in the three digits. Seemed like we were doing 80 MPH.
 
Went down to IMSA 12 Hours of Sebring races. Taking the two lane roads down there I had to pass like three cars you could see probably a mile. I looked down and were at three digits MPH. Wondering if anyone else has had there LC in the three digits. Seemed like we were doing 80 MPH.
I hit 110 when I first got it… coming from a Tacoma that I had to push to hit 80, I was shocked at how quick it responded when passing other cars, then just figured I’d see what she could do… but hit 110 with zero effort and backed off. Good enough.🫣
 
Today I added some textured vinyl to my front doors as well as on the rocker panels. I will be adding some to my back doors once I get more vinyl. I hope someone Taco Vinyl makes these because the templates are a pain to make.
 

Attachments

  • IMG_9845.jpeg
    IMG_9845.jpeg
    428.3 KB · Views: 80
  • IMG_9844.jpeg
    IMG_9844.jpeg
    210.9 KB · Views: 84
Installed the Offroam phone holder. Really nice fit and I can put the phone within fingertip distance from the steering wheel. I’m using a 20-17mm dual ball adapter and the magnetic mount from the AXIS mount I had before, at least for now.

IMG_2098.jpeg

IMG_2103.jpeg
 
Installed the Cartrimhome hatch light... took about 5 minutes and works great! Guess I should add it takes 5 mins if you havea rear powered hatch. Should have come with this from factory...

 
Installed the Cartrimhome hatch light... took about 5 minutes and works great! Guess I should add it takes 5 mins if you havea rear powered hatch. Should have come with this from factory...

What's different about the powered hatch version? I popped the small trim piece off and was hoping to find a plug for wiring but no luck on my LC Premium.
 
Hatch powered version uses the power wire from the hatch close button.. it uses a y adapter in line to power the light. Hatch button and light are ~5" way from each other.
 
On the FE version the power hatch has a different power wire for the lights........

Rear Hatch Light Orig.jpg
 
Back
Top