Interior Trim Removal

BigMF

Well-known member
📛 Founding Member
May 29, 2024
221
Media
62
280
Nashville, TN
Vehicles
2024 Land Cruiser Premium, 2011 Lexus LX570 (Retired)
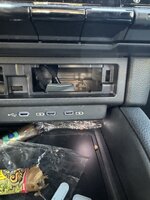
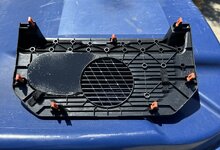
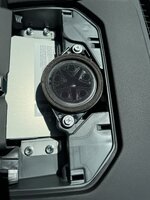
All, I thought it would be good to start a thread related to removing interior trim pieces the RIGHT way that we could all add to over time. I know there are good instructions available in the Toyota system but we don’t have a repository where we can gather that info. I haven’t done any YET but I know other folks have already.

Hopefully, it will be useful to folks over the years and people like @EOD Guy doesn’t have to respond on a daily basis how to take the trim apart to run wire from the engine bay to the cab.

So, if you think this is a good idea please post your questions, answers, solutions here for the greater good.
 
I’ll start it off with: How do you gracefully remove these white clips under the storage tray next to the 12V battery in the cargo area?

1723682250655.png
 
I’ll start it off with: How do you gracefully remove these white clips under the storage tray next to the 12V battery in the cargo area?

View attachment 8157
I know this isn't exactly what you're looking for, but towards the middle of the document it shows the floorboard and the fasteners (step 13).
 

Attachments

  • HV BATTERY_ REMOVAL 3.pdf
    6.9 MB · Views: 116
Last edited:
I’ll start it off with: How do you gracefully remove these white clips under the storage tray next to the 12V battery in the cargo area?

View attachment 8157
I needed to get that piece removed this morning and after looking at the fasteners..... grabbing the tray from the rear most area, just give it a good yank and it'll pop right off.
 
I know this isn't exactly what you're looking for, but towards the middle of the document it shows the floorboard and the fasteners (step 13).
Thank you so much for this! This is a great resource!
 
Rear cargo floor:
All the trim pieces are held in place by those plastic Christmas tree type fasteners. The rear most piece of trim covering the lock catch........ the weather stripping is just adhesive taped to the structure so be very careful when pulling that piece of trim off.

L/H upper tray (by the battery has two tabs securing it to the lower tray)

L/H lower tray - Grip by the rearward most (closest to the bumper) end and give it a good upward yank, it'll pop right off

Rearmost threshold trim piece, pulls straight up

R/H tray has 3 hooks/tabs along the inner most long edge, I used a trim removal tool and started at the back, gently prying and the tabs disengaged. There are also 2 hidden Christmas tree fasteners attached to the bottom, firm yank and it came out as well, one of the trees stayed in the body and needs to be removed and placed back on the bottom of the tray.

Carpeted floor board has Christmas tree fasteners as well.
 

Attachments

  • Cargo 1.JPG
    Cargo 1.JPG
    269.9 KB · Views: 95
  • Cargo 2.JPG
    Cargo 2.JPG
    325.6 KB · Views: 95
  • Cargo 3.JPG
    Cargo 3.JPG
    446.6 KB · Views: 108
Last edited:
Driver's Knee Bolster removal, (Center console). It's held in place with those "arrow" type clips. I used a trim tool (see picture) and started it enough to get a good grip, then a good yank towards the driver door, it came right off.
 

Attachments

  • Knee Bolster.JPG
    Knee Bolster.JPG
    353.1 KB · Views: 98
Instrument Panel Safety Pad Removal
 

Attachments

  • INSTRUMENT PANEL SAFETY PAD_ REMOVAL.pdf
    6.9 MB · Views: 56
Switch panel just below the AC controls.

Uses the "arrow" style fasteners, it was a pian to figure out, but with a plastic hook trim removal tool, it pulls straight out.
 

Attachments

  • Ctr Trim Panel.JPG
    Ctr Trim Panel.JPG
    285.7 KB · Views: 67
Switch panel just below the AC controls.

Uses the "arrow" style fasteners, it was a pian to figure out, but with a plastic hook trim removal tool, it pulls straight out.
Can you describe or provide a picture of what you mean by "plastic hook trim removal tool"? I have a set of trim removal tools but not sure if any of them is what you are describing.
 
I had to sharpen the 90 degree tip and heat the long part in the middle to form a better shape. My goal was to get the switch blank out.
1723948865945.png
 
This is great, thanks.

Does anyone know how to get the tailgate/rear hatch trim removed?
 
I stumbled on this thread that had good details for the front door trim

 
I did it in my "EOD Guy's Ride" Basically just yank it.
I saw that, thanks. Just want to make sure there aren't any sneaky screws like the doors.

Did you drop the door control before or after the trim was off?
 
I saw that, thanks. Just want to make sure there aren't any sneaky screws like the doors.

Did you drop the door control before or after the trim was off?
After, once you pop the fasteners, it'll turn and slip through the opening. There are no tools required for the removal. The two wires that connect to the lights, the connectors are wrapped in foam tape. A second pair of hands or a high table are most helpful. once you get the panel removed you can press the close button and when it gets to an easier height press, it again and the door will stop.
 
Center Speaker Grill:

It attaches with the "arrow" type fasteners (no screws). Use a trim tool, insert it just behind the infotainment trim piece (where the speaker grill meets the infotainment trim piece) pry gently towards the front bumper and up towards the windshield. Once a gap forms, insert the trim tool and gently twist (like screwing in a screw) it'll pop straight up.

The picture is my radar/cell phone mount mod (search for "Eod Guy's Ride")
 

Attachments

  • Speaker Grill.JPG
    Speaker Grill.JPG
    351.2 KB · Views: 72
  • Speaker Grill 2.JPG
    Speaker Grill 2.JPG
    428.4 KB · Views: 51
Front Door Panel:

Held on with the Christmas Tree fasteners and 3 Phillips screws. You will need to remove the trim cover in the arm rest area (pry with trim tool from the top) and the trim panel behind the door handle (pry with trim tool from the edge closest to the door handle. Three screws to remove, and it pops off. Make sure a take a picture of the door cables (green and a white one) they just pop off, but if you forget which one goes where and you mix them up, you can effectively lock the door and if you close it, no way to open it back up, happened to me on my Taco. I take them off so many times, I wrote with a silver sharpie which one went where.
 

Attachments

  • FRONT DOOR SPEAKER.pdf
    390.9 KB · Views: 27
@EOD Guy, you haven't happened to do the back of the center console yet?

1724274795248.png
 
Back
Top