🛠️ Member Build GlibGlob’s Wind Chill Pearl LC

Member Build

glibglob

Member
đź“› Founding Member
Sep 9, 2024
79
Media
8
50
Roaming
Vehicles
LC Base
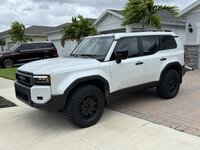
Coming from a Tacoma. Preciously had an FJ and have always loved them. Never found a deal on an 80 series at the right time. Was very excited to hear about this new LC250.

Couple things I’ve ticked off the list so far:

  • Dark tint (need it in places like FL and CO)
  • Tacoma 18”/45mm wheels wrapped in 275 KO3s (took tons of work and replacements to get balanced well)
  • Dash cam relocate
  • Polymer + ceramic sealant… goodness that’s always a lot of work
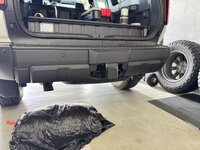
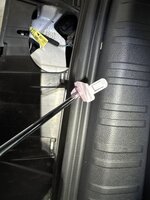
  • Removed air dams and side steps

Soon:
  • CENTER CAPS!! geez been waiting for 6 weeks!
  • skid plate upgrade
  • maybe PPF on front area, unsure. my taco took a beating but never rusted so 🤷‍♂️
  • maybe sliders

Eventually:
  • tire hitch swing out with full spare
  • rack swap

Working on planning a trip to blue ridge this fall to get some wheeling in. Spent a few years out west so it’s been a while since I’ve explored the east coast. Excited for it!
 

Attachments

  • IMG_0999.jpeg
    IMG_0999.jpeg
    323.3 KB · Views: 127
Last edited:
Swapped out rear silver valences. This took more patience than anything.

I used trim tools to pop up the top bumper cover.

Maybe not needed but I like wiggle room so I dropped 6 bolts from the bumper trim.

The I used my hands to depress and unclip the bottom 6 clips.

Then I used flat heads to depress and pop out the top clips. My pliers were not skinny or long enough to retrieve or place clips back in so I used some tape to guide them on the screwdriver.

Getting the top clips back in on passenger side was rough. I started the the inner one and just crammed my hands up there with the clip ready and used the other hand to seat the cover so I could thread the clip through. Once that was on I used my hands to place the clip just in front of the outer top clip, seated the cover gently as to not knock the clip down, then used a flat head through the tiny slot on top to seat it.

Clipping the bottoms was easy.

Phew glad thats over lol. Be careful with all of this it’s plastic!
 

Attachments

  • IMG_1058.jpeg
    IMG_1058.jpeg
    381.3 KB · Views: 19
  • IMG_1056.jpeg
    IMG_1056.jpeg
    326.1 KB · Views: 19
Swapped out rear silver valences. This took more patience than anything.

I used trim tools to pop up the top bumper cover.

Maybe not needed but I like wiggle room so I dropped 6 bolts from the bumper trim.

The I used my hands to depress and unclip the bottom 6 clips.

Then I used flat heads to depress and pop out the top clips. My pliers were not skinny or long enough to retrieve or place clips back in so I used some tape to guide them on the screwdriver.

Getting the top clips back in on passenger side was rough. I started the the inner one and just crammed my hands up there with the clip ready and used the other hand to seat the cover so I could thread the clip through. Once that was on I used my hands to place the clip just in front of the outer top clip, seated the cover gently as to not knock the clip down, then used a flat head through the tiny slot on top to seat it.

Clipping the bottoms was easy.

Phew glad thats over lol. Be careful with all of this it’s plastic!
I have a black LC and the silver is really starting to bother me. Could you let me know how/where you got the darker valences? I would love to do this to mine. I also wish the plastics were a little darker or at least a bit glossier to match the paint a bit more. For anyone that has seen the new Raptors I like that plastic finish better than the dull finish on the LC. Wish I was more of a car guy to do some of these mods.
 
Posted the part numbers in that other thread as well but will post here in case others look here.

If it were up to me it would have 50% less plastic on the exterior overall haha.
 

Attachments

  • IMG_1059.jpeg
    IMG_1059.jpeg
    115.3 KB · Views: 10
Back
Top