Battery Jump Box Charger Installation

ferrari1898

Member
๐Ÿ“› Founding Member
Jul 15, 2024
47
Media
11
77
Charlotte, NC
Vehicles
2024 Land Cruiser w/ Premium Package
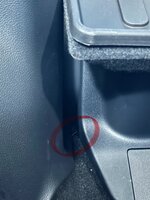
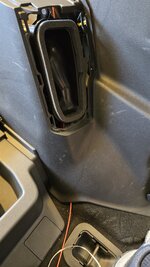
I have a NOCO Battery Jump Box and instead of having to remember to charge it up every few months or before a big trip, a USB Micro connection to keep the battery fully charged. I purchased a 12V to USB Micro adapter (from Amazon) which I am using to tap into the wiring harness for the USB C connector in the right rear of the Land Cruiser. The USB is only powered when the vehicle is on, which is ideal to avoid an additional vampire draw when the Land Cruiser is off.

The USB comes out pretty easy with a set of trim tools (previously purchased from Amazon).

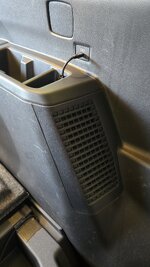
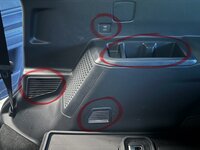
To help fish the wire down and behind the trim I had to remove a couple vent covers and the cupholder for the non existent 3rd row.

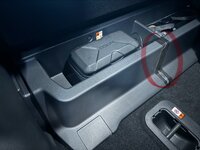
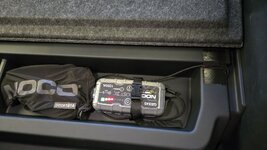
With the back seat flipped up it is pretty easy to hide the wire under the plastic storage bin.

Finally, I have some Gorilla Tape to keep the cord in place.

The end result is essentially a stealth installation with the tape only visible when the seat is folder up and a small wire exposed at the transition from the interior wall trim and the plastic storage bin. The only thing I do not like about this solution is that if I need the jump box while also traveling with gear behind the back seat, I have to unload to gain access to the storage area.
 

Attachments

  • IMG_3305.JPEG
    IMG_3305.JPEG
    313.2 KB · Views: 275
  • IMG_3302.JPEG
    IMG_3302.JPEG
    284 KB · Views: 216
  • IMG_3303.JPEG
    IMG_3303.JPEG
    304.6 KB · Views: 234
Nice install! Solution to your traveling unload problem....... remove it from the storage area before you pack up the back.

Is there enough room back by the battery to install it there?
 
Nice install! Solution to your traveling unload problem....... remove it from the storage area before you pack up the back.

Is there enough room back by the battery to install it there?
The rear storage cubby by the liftgate is a sliver bigger then the one behind the rear seat. I had toyed with adding a fuse and charging the NOCO directly from the Toyota Battery. While it does not draw much power, it would be on 24/7. IMO that would be an easier install, but it only took me 45 minutes with most of that time spent finding wire cutters for the REALLY thin gauge wire.
 
The rear storage cubby by the liftgate is a sliver bigger then the one behind the rear seat. I had toyed with adding a fuse and charging the NOCO directly from the Toyota Battery. While it does not draw much power, it would be on 24/7. IMO that would be an easier install, but it only took me 45 minutes with most of that time spent finding wire cutters for the REALLY thin gauge wire.
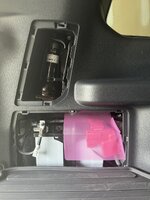
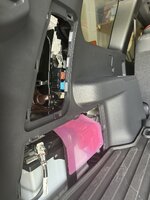
I was thinking behind the trim panel where the battery is located. You could still power it by USB by re-routing your cable. And should you find the need to use it......... it's already there. IDK if there is enough room in that location or not, but that would be my choice if there is.
 
I was afraid of that. I plan on installing an air compressor behind one of the trim panels, hopefully I'll find a space somewhere.
 

Attachments

  • IMG_3306.JPEG
    IMG_3306.JPEG
    947.3 KB · Views: 198
  • IMG_3307.JPEG
    IMG_3307.JPEG
    681.1 KB · Views: 187
Looks like that side has very little room for an air compressor. The pass side might, tho' it won't be easily accessible.
 
I liked the install that atomic67 did with his NORCO jump start, I did the same except I put mine on the driver side so I could tie it down using the factory strap. I moved my jack tools to the compartments by the tailgate, thought it makes more sense to have the tools next to the jack. also it saves the larger storage compartment on the right side for other crap.
 

Attachments

  • 20241111_105356.jpg
    20241111_105356.jpg
    360.6 KB · Views: 26
  • 20241111_111828.jpg
    20241111_111828.jpg
    365.4 KB · Views: 27
  • 20241111_112014.jpg
    20241111_112014.jpg
    286.6 KB · Views: 29
Back
Top