Navigation
Install the app
How to install the app on iOS
Follow along with the video below to see how to install our site as a web app on your home screen.
Note: This feature may not be available in some browsers.
More options
You are using an out of date browser. It may not display this or other websites correctly.
You should upgrade or use an alternative browser.
You should upgrade or use an alternative browser.
🛠️ What Have You Done To Your LC250 Today?
- Thread starter pnwlandcruiser_
- Start date
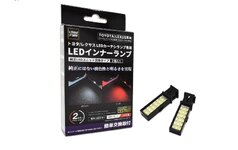
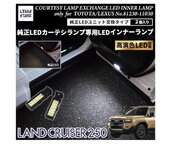
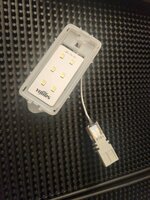
How are you liking this upgrade? Is it really that much brighter than stock?Upgraded the interior mediocre vanity and rear LED lights. Ordered from Japan. Was not easy to install with instructions in Japanese. Thought they had sent me the wrong product and about to give up when I figured out I had to remove some pieces of the original LED lights.
How are you liking this upgrade? Is it really that much brighter than stock?
Love it, like night and day. It was easy install after I figured out what to do.
On the way too is an upgrade to the front door LED lights.
Attachments
Last edited:
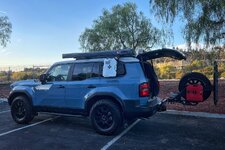
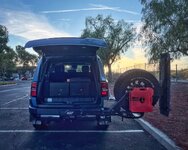
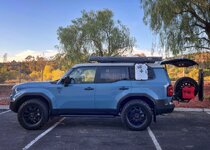
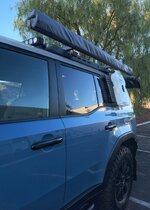
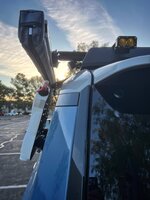
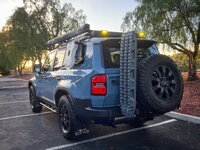
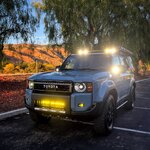
To follow up my last post, attached are more photos of my setups.Attached photos are parts of my setups for Overlanding. Some of them were shared in my other posts which you can search for them if you like.
Soon, I will share the completed/entire setups with:
• Rooftop tent (Ikamper mini)
• Hitch-mount spare tire carrier: 33” OK3 tire, extra fuel+water, recovery boards Maxtrax, license plate with light, etc.
• Side panels with extra fuel / water + shovel/ etc.
• All AC lights: rock lights, bumper light bar, ditch lights, front roof spot lights, side lights, chasing lights
• Control panel / switch panel for all AC lights
• ARB side awning
• ARB built-in air compressor
• Drawer system , fridge slider
As a designer and off-road / off-grid camping person, I utilized all available stuffs to customize for my taste / uses.
I learned and did those over years with my Gwagon for same purposes above without much after marker gears manufactured for it. (See my gwagon photos for my previous custom works)
I have RTT Ikamper mini, but did not have it in these photos. Probably in future
You may notice my ARB awning installed a bit further out from OEM roof rack because RTT edge will sit right above it (Ikamper RTT is 55” wide…wider than roofrack width). The 2 Rhino heavy duty cross bars which laid on top of cross bars of roofrack to give me 1.5” raise for easy install and take off RTT. Also they are the base for ARB awning brackets connected.
Happy Holidays to all and happy Land Cruiser
Attachments
-
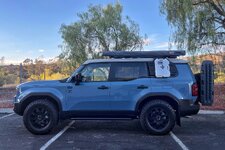 IMG_7930.jpeg418.7 KB · Views: 332
 -
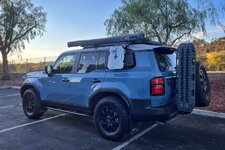 IMG_7931.jpeg425.9 KB · Views: 301
 -
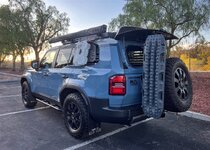 IMG_7932.jpeg516 KB · Views: 282
 -
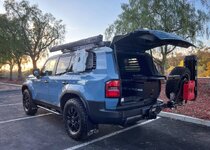 IMG_7933.jpeg499.1 KB · Views: 274
 -
 IMG_7934.jpeg448.2 KB · Views: 276
 -
 IMG_7935.jpeg503.2 KB · Views: 271
 -
 IMG_7937.jpeg428.2 KB · Views: 268
 -
 IMG_7938.jpeg345.2 KB · Views: 250
 -
 IMG_7940.jpeg232.5 KB · Views: 255
 -
 IMG_7942.jpeg468.3 KB · Views: 262
 -
 IMG_7939.jpeg608.8 KB · Views: 332
 -
IMG_7918.mov4.1 MB
To follow up my last post, attached are more photos of my setups.
I have RTT Ikamper mini, but did not have it in these photos. Probably in future
You may notice my ARB awning installed a bit further out from OEM roof rack because RTT edge will sit right above it (Ikamper RTT is 55” wide…wider than roofrack width). The 2 Rhino heavy duty cross bars which laid on top of cross bars of roofrack to give me 1.5” raise for easy install and take off RTT. Also they are the base for ARB awning brackets connected.
Happy Holidays to all and happy Land Cruiser
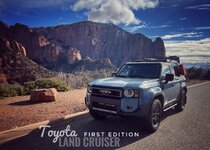
Damn, best so far. Love the American flag on the glass!
Can you believe that here we are, 14 months later, still waiting??Gotta get one first! The dealership owner took their 1st Edition. 1958 incoming, but want a LC trim with the Premium Package.
How do you like the rear tire swing? Does not having availability to the reverse sensors bother you?To follow up my last post, attached are more photos of my setups.
I have RTT Ikamper mini, but did not have it in these photos. Probably in future
You may notice my ARB awning installed a bit further out from OEM roof rack because RTT edge will sit right above it (Ikamper RTT is 55” wide…wider than roofrack width). The 2 Rhino heavy duty cross bars which laid on top of cross bars of roofrack to give me 1.5” raise for easy install and take off RTT. Also they are the base for ARB awning brackets connected.
Happy Holidays to all and happy Land Cruiser
What do those do that the OEM points don't do?
Spare tire swing/carrier is ONLY used for off-road trip. So, I temporarily okay without reverse sensor in the woods ( I just turn it off). I believe that soon in future, aftermarket will come up with spitting wire idea to connect to the OEM backup camera
Most of time in the city, I still have spare tire at original place, that’s why I picked AT tire size OK3 275/70 R18
Most my setups ideas are put in or take off quickly. Personally/ my purpose is not carrying around in town with whole bunch of Overlanding gears.
Most of time in the city, I still have spare tire at original place, that’s why I picked AT tire size OK3 275/70 R18
Most my setups ideas are put in or take off quickly. Personally/ my purpose is not carrying around in town with whole bunch of Overlanding gears.
- Oct 15, 2024
- 134
- Media
- 25
- 245
- Vehicles
- '24 J250 FE, '88 J62, '24 BMW R 1250 GS, '24 Ducati Streetfighter V4S, '21 BMW RnineT
I simply like them better. They seem at least as strong as OEM but I think they look nicer.What do those do that the OEM points don't do?
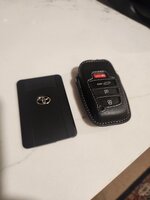
Thats slick! How did you get one, did you order it from the dealer?Had my digital card key finally programmed today at a local Toyota dealership. Absolutely loving not having to carry that big ass key fob anymore. Super thin.
Thats slick! How did you get one, did you order it from the dealer?
Order it online from a Toyota dealership like Ed Martin. Much cheaper than the local stealership here in the Bay Area. The part is actually for a 5th generation Tundra or Tacoma but will work on the LC.
- Moderator
- #334
There's a few posts concerning the CC key.Thats slick! How did you get one, did you order it from the dealer?
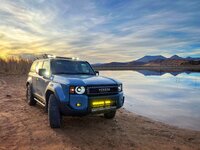
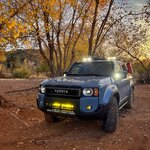
The photoDamn, best so far. Love the American flag on the glass!
Soon will be more manly with dirts and muds
Attachments
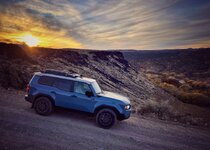
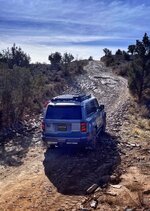
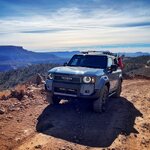
I just posted few photos of my current off-road trip with my wife and kids…drove alone through crazy/super rugged trails…Stock LCFE flew through it with my heart beatsThe photowears with clean “shirt”
Soon will be more manly with dirts and muds
I got used to my lifted Gwagon, but LC can be my second to top
I also posted some photos to “photos of the month” session, please vote hehehe
Attachments
I just received it, please share your install tips.Love it, like night and day. It was easy install after I figured out what to do.
On the way too is an upgrade to the front door LED lights.
I just received it, please share your install tips.
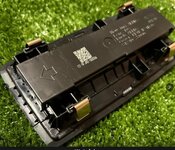
Main dome light
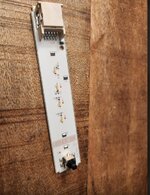
Remove the whole light together. Don't try to remove the lens first. It will break like mine did. Look at photo on how its held, just yank out. Easier to remove lens with the whole thing out. Be careful not to break the lens. Remove the back plastic cover (photo). Remove old LED circuit board (no longer needed). Split apart the light and circuit that came with the new kit. Place one side below and the other one on the other side, connecting the pins that keeps it together. Fish the connector with the adapter. Plug it back in the roof then snap the lens back in place.
Vanity Light
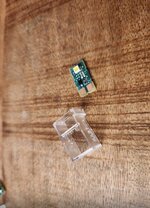
Here you can pull out the lens first if you like or the whole thing then unplug. Remove the small clear plastic cover (photo) with a small flat head tool. Then pull out the LED light (photo). You will no longer use the clear plastic cover and old LED light. Take the plug end of the new vanity Light and plug it where the old LED light was. There is a lot of room in there but it will snap in towards one side and will stay put. Remove adhesive of the new lighg and secure in place. Fish plug out the opening and Plug it back in the car to test. Important, snap the lens back onto the vanity Light while it's still out and dangling. It will only snap back in one way or else it will keep popping out like it did with me.
Sounds like a lot, but once I figured it out, it literally took me only less than 5 mins to do the other vanity Light. Same goes with the dome light. Super easy if you know what to do.
Attachments
Niiiice. I am looking at offroad trailers right now because I went the RTT on my 4Runner and it was a PITA opening and closing it to use my truck while base camping. For overnight stays it's fine but with an extended stay anywhere it will be a trailer for me from now on so I can have my truck free to explore without all the work to prep it.Happy too! The trailer is a Turtleback Getaway, I post some images of the setup
-22 gallon water tank
-2 marine grade batteries (5-7 days off grid power)
-Solar panel inputs
-King size mattress in rooftop tent
-instant hot water heater
-33” offraod tires
-dual independent suspension, no cross axle
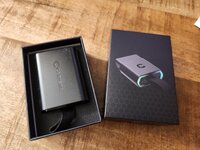
Got the Carista Evo today and customized the following hidden settings on the LC FE.
- got rid of that annoying driver seatbelt chime
- trunk lid button lower dash from long push to short push
- signal chime from medium to low
- long push on remote to lower all the windows at once including the sunroof
Attachments
Similar threads
- Replies
- 4
- Views
- 794
- Replies
- 6
- Views
- 1K
- Replies
- 151
- Views
- 12K
- Replies
- 48
- Views
- 16K
- Replies
- 3
- Views
- 1K
