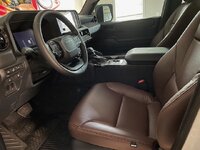
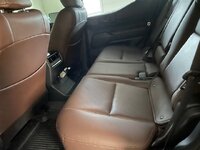
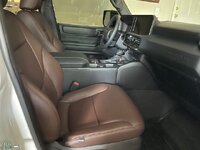
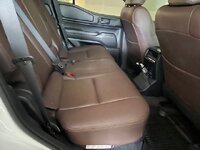
I was curious about the speaker size & quality, so I pulled a front and rear door panel. I thought I would attach photos to assist others in removal. FYI, this is a 1958 edition.

Behind the handle is a trim piece to pry off using your removal tool. Once you do, there is a single Philips screw to remove.

Now, behind the armrest, there is this panel to remove.


There are 2 Philips screws to remove behind the panel:

Next, you are ready to pull the panels off with the pry tool, starting at the bottom. By the way, be sure and check the clips, as they tend to not pull off with the panels. You will notice that two of the clips stayed in the doors in the next picture. What you will need to do is gently pry them out of the doors and slide them back into the slots in the panels. To do this, I used a pair of wire cutters, making sure not to cut or damage the clips.

The next 2 pics shows that there are electrical connectors to unclip prior to the panel removal. I counted 3 on the front door, for the door locks, power windows, and door light at the bottom. Also, the door latch and power lock actuator cables need to be pulled away from the panel.


Here is a pic without the panel. By the way, the white plug to the left side of the speaker was not hooked up and was just dangling. I looked inside the connector, and it was unpinned. It appears that maybe the LC and FE editions may be using this plug for an additional feature that the 1958 does not use.

Here is a pic of the front woofer. I was pleasantly surprised that the cone material is no longer paper as with my prior 4Runners. It appears to be a polypropylene material, which will most definitely sound better and last longer than paper. Good job Toyota! However, Toyota gets no kudos on the goofy speaker bracket size. The speakers are 6 1/2" like my 4Runner. However, the brackets by my measurements are 7 3/4 x 9" and are oval in shape. This was similar to my 4Runner. So, unless I can do some self fabrication on the old brackets, I may need to wait until Crutchfield researches the LC and offers a bracket that properly fits an aftermarket 6 1/2 woofer. Here is a closeup of the speaker, the difference in bracket size vs. speaker is not as noticeable as it is in person. On the rear door, the bracket is round and not oddly sized for the 6 1/2 speaker. By the way, the removal of the rear panel is the same as the front. However, it is much harder to put back in place than the front panel. The reason is that the top of the door panel sits down inside the inner frame and "hangs", so in order to put it back on you have to first align it perfectly with the inner frame and then push down on it. I could not get any photos of this. Just be patient and you will get it back on. Practice makes perfect.

I took some photos of the 3 1/2 full range speaker in the corner as well.


Toyota used paper for these full range cones instead of better material for some reason. In any case, I will try the factory speakers first with an amp and see whether that solves the issue of distortion at higher music levels. Oh, and by the way, I was able to confirm that the armrests on the door panels are removable. It appears that Toyota designed them that way so that 1958 owners can later have them wrapped in SofTex or leather like the higher grades. I have an appointment next week with a Katzkin installer to have the cloth seats skinned and wrapped in Java leather. I will ask whether they can do the armrests and center console lid also. Cheers!
Behind the handle is a trim piece to pry off using your removal tool. Once you do, there is a single Philips screw to remove.
Now, behind the armrest, there is this panel to remove.
There are 2 Philips screws to remove behind the panel:
Next, you are ready to pull the panels off with the pry tool, starting at the bottom. By the way, be sure and check the clips, as they tend to not pull off with the panels. You will notice that two of the clips stayed in the doors in the next picture. What you will need to do is gently pry them out of the doors and slide them back into the slots in the panels. To do this, I used a pair of wire cutters, making sure not to cut or damage the clips.
The next 2 pics shows that there are electrical connectors to unclip prior to the panel removal. I counted 3 on the front door, for the door locks, power windows, and door light at the bottom. Also, the door latch and power lock actuator cables need to be pulled away from the panel.
Here is a pic without the panel. By the way, the white plug to the left side of the speaker was not hooked up and was just dangling. I looked inside the connector, and it was unpinned. It appears that maybe the LC and FE editions may be using this plug for an additional feature that the 1958 does not use.
Here is a pic of the front woofer. I was pleasantly surprised that the cone material is no longer paper as with my prior 4Runners. It appears to be a polypropylene material, which will most definitely sound better and last longer than paper. Good job Toyota! However, Toyota gets no kudos on the goofy speaker bracket size. The speakers are 6 1/2" like my 4Runner. However, the brackets by my measurements are 7 3/4 x 9" and are oval in shape. This was similar to my 4Runner. So, unless I can do some self fabrication on the old brackets, I may need to wait until Crutchfield researches the LC and offers a bracket that properly fits an aftermarket 6 1/2 woofer. Here is a closeup of the speaker, the difference in bracket size vs. speaker is not as noticeable as it is in person. On the rear door, the bracket is round and not oddly sized for the 6 1/2 speaker. By the way, the removal of the rear panel is the same as the front. However, it is much harder to put back in place than the front panel. The reason is that the top of the door panel sits down inside the inner frame and "hangs", so in order to put it back on you have to first align it perfectly with the inner frame and then push down on it. I could not get any photos of this. Just be patient and you will get it back on. Practice makes perfect.
I took some photos of the 3 1/2 full range speaker in the corner as well.
Toyota used paper for these full range cones instead of better material for some reason. In any case, I will try the factory speakers first with an amp and see whether that solves the issue of distortion at higher music levels. Oh, and by the way, I was able to confirm that the armrests on the door panels are removable. It appears that Toyota designed them that way so that 1958 owners can later have them wrapped in SofTex or leather like the higher grades. I have an appointment next week with a Katzkin installer to have the cloth seats skinned and wrapped in Java leather. I will ask whether they can do the armrests and center console lid also. Cheers!


